How to photograph a copyright page clearly
Take a readable copyright-page photo without forcing a book flat. Use a framing checklist, check small print and keep full-page context beside detail shots.
By Creasy Spines · · Sources and method below
The short answer
Photograph the complete copyright page in even light, with the camera facing the page squarely and every line inside the frame. Check the saved photo at an enlarged size before putting the book away. Add a separate detail shot if small print is unclear, while keeping the full-page photo. Support the book in a comfortable opening; do not press its binding flat to improve the picture.
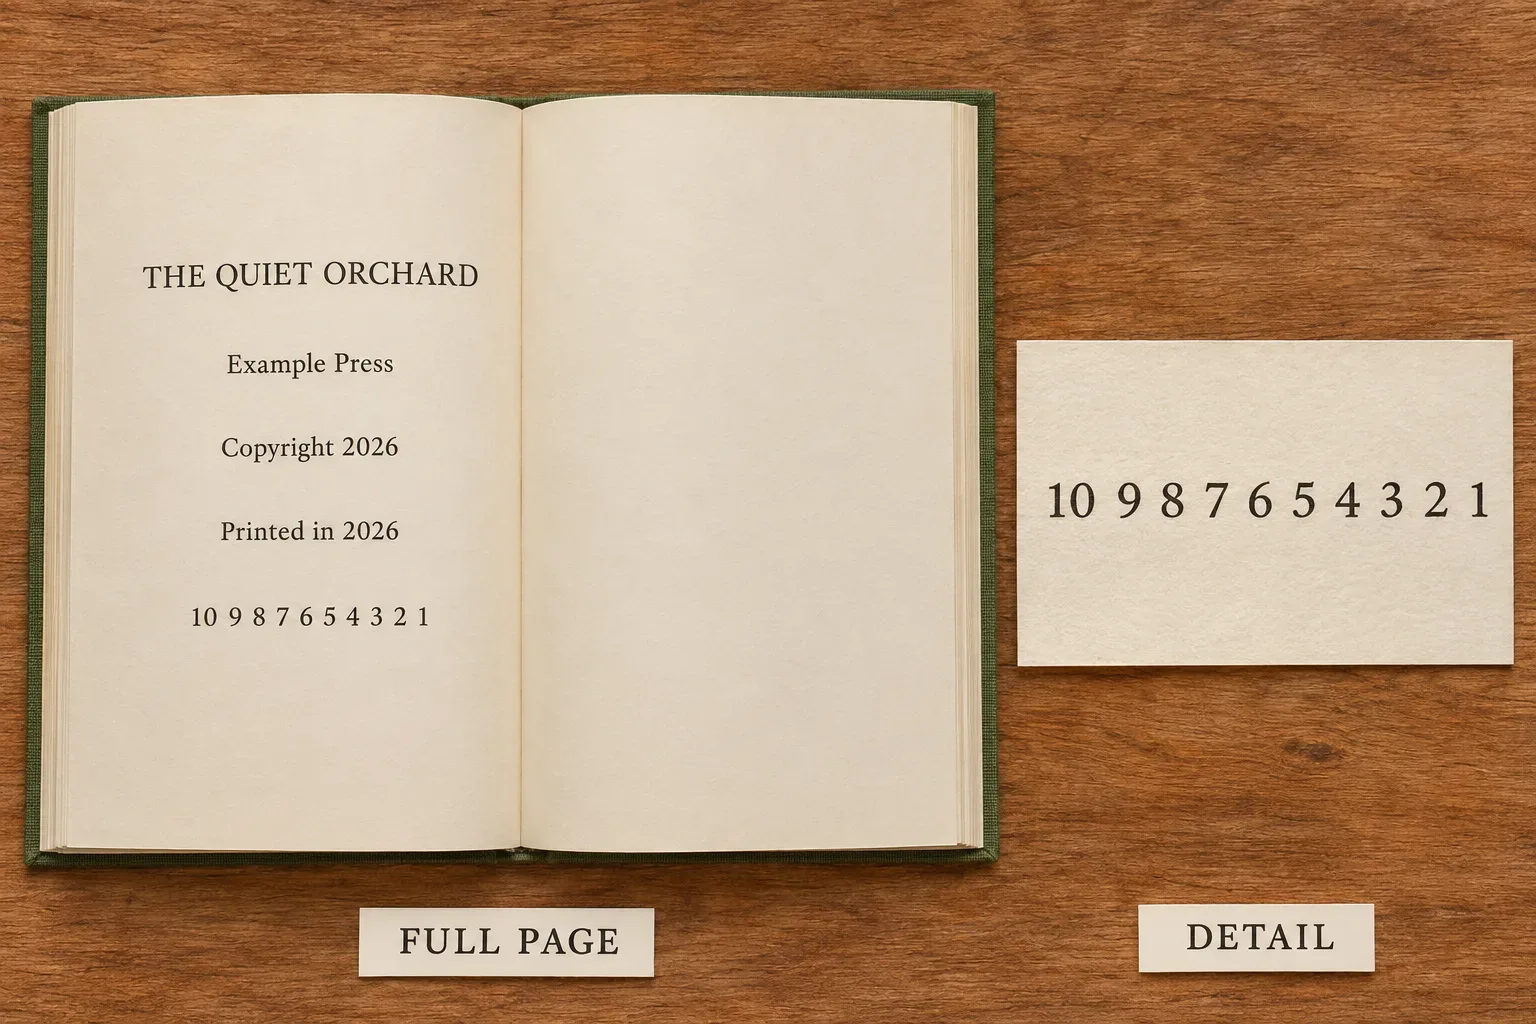
Keep the whole page before chasing a number line
Look for the copyright and publishing information, often on the back of the title page. Start with a photograph that includes the entire page and a small margin around it. A sharp crop of a printing key can still omit the publisher, dates or a notice that changes how the copy should be described.
Edition Detective asks for a complete copyright-page image and uses statements, dates, number lines and publisher conventions together. If information continues onto another page, keep a separate image of that page as well. Photograph the title page or jacket separately when useful; a cover or spine is not a substitute for the publishing information.
Sources: 1
Set up the book without forcing it flat
Use a clean, clear table and clean, dry hands. Remove nearby receipts and personal papers from the frame. Let the book open only as far as it comfortably allows, and adjust the camera position to suit the page. The Library of Congress’s digitization guidance warns against pressing books flat and recommends cradle support for weak joints or restricted openings.
If the binding resists, a page is brittle or text disappears into a tight gutter, stop rather than pulling the book wider. Leave the hidden text unresolved or seek appropriate handling help for a fragile copy. Do not put glass or a heavy object on the page to flatten it for the photograph.
Sources: 2
Use light and focus to make small print readable
Try soft, even light across the page. Before taking the picture, look for a bright reflection covering the text or a shadow from the phone. Move the light or your position until the publishing information is visible. Turning off the flash can be useful when it creates glare; this is a practical starting method, not a rule that one lighting setup works for every page.
On iPhone, Apple’s camera guide describes tapping the screen to choose the focus area and adjusting exposure beside it. Aim the focus at the small print and check whether pale lettering remains visible. Use the equivalent controls described by your own phone’s manufacturer if you have another device. Keep the phone steady, take the photo, then judge the saved image rather than relying on the live preview.
Sources: 3
Run this five-point check before putting the book away
Hold the camera so it faces the page as squarely as the book’s safe opening permits. Keep all the text in view rather than filling the frame with just the middle. A page photographed at a steep angle can leave the far edge too small to inspect. If moving very close makes the text blurry, back away until focus returns.
Open the saved photo and enlarge it. Read from the publisher information through to the last printed line, comparing it with the page in front of you. A photograph is ready to use when you can distinguish the actual letters and numerals you need, not simply recognise the layout.
- The publisher or imprint, dates and any edition or printing statements are fully visible.
- The complete number line, including any letters, fits inside the frame.
- No glare, shadow, finger or page curve hides the text you need.
- The smallest relevant characters remain distinct when the saved image is enlarged.
- Both the overall page and any additional detail shots belong to this same physical copy.
Worked example: a full page plus one detail
The generated illustration shows an invented page and an enlarged view of its number line. The full view preserves the relationship between the publisher, the two date lines and the printing key. The detail makes the small characters easier to inspect, but cannot replace the context that the full page supplies. These fictional details do not identify a real edition.
For your own copy, suppose the overall photograph is clear but the final characters near the gutter are blurred. Keep that image, then take a closer photograph of the entire affected line if the book can be handled safely. If another photo still leaves a character uncertain, record that uncertainty. Do not fill in an expected sequence or borrow a clearer page from another seller’s listing.
Keep the images together with a simple copy label, such as 'blue hardback, study shelf', and names such as 'copyright-full' and 'copyright-detail'. Those are suggested notes for your own files, not an automatic inventory feature. Preserve the original photograph if you make a rotated or cropped copy, and avoid image-generation or cleanup tools that replace the printed details.
Sources: 1
Use the photograph for a check you can review
Edition Detective currently accepts JPEG, PNG and WebP photos. Choose the complete copyright-page image first, with relevant additional views if needed. Its form also provides fields for information the photo might miss. Copy only what you can actually read; an uncertain character should remain uncertain rather than becoming a confident typed guess.
Compare the explanation with the photographed page and the relevant publisher guide. A readable photo improves the evidence available for interpretation, but it does not authenticate a signature, establish provenance or inspect the binding. The separate number-line guide explains interpretation; this capture method helps preserve the information needed to check that interpretation.
Sources: 1
Sources & checking notes
These sources support the factual explanations. Practical examples and suggested methods are editorial guidance; they are not a claim of a personal visit, appraisal or independently tested result.
- Creasy Spines: Edition Detective photo requirements and limitsSource checked 2026-11-07
- Library of Congress: preservation guidelines for digitizing library materialsSource checked 2026-11-07
- Apple iPhone User Guide: camera tools, focus, exposure and flashSource checked 2026-11-07
A few more useful answers
- Should I photograph the title page or the copyright page?
For an edition check, start with the complete copyright page. Keep a separate title-page photograph when it helps establish the title, author or imprint. If publishing information appears on more than one page, preserve those views together.
- What if the book will not open flat?
Do not force it. Adjust the camera to the opening the binding comfortably permits, with suitable support where needed. Leave hidden details unresolved if you cannot capture them safely; a photograph is not worth damaging the copy.
- Can I crop out the margins before uploading?
Keep an original view with the complete page and some margin. A separate crop can help show small print, but check that it does not remove a publisher name, notice, date or part of the number line. Use the crop alongside the full view.
- What should I do if one number is still unreadable?
Compare the saved image with the physical page and try a better-lit detail photo if safe. If it remains unclear, record it as unreadable. Do not infer a missing numeral from a familiar sequence or let generated enhancement invent the character.